Wikipedia Medicine Newbie Crash Course
Posted on 29th August 2014 by Ammar Sabouni
So you’re interested in all this talk about getting involved in open access and availability of medical information for all, want to help edit Wikipedia and think you can use your medical knowledge/expertise to add something new, BUT (like me a couple of weeks ago) you don’t know the first thing about editing, what a talk page is, and what all those weird lines ( | ) and squiggles (~) are even called let alone how to use them! Rest assured you’ve come to the right place.
We all use Wikipedia for health content and giving a little back by helping edit is a great thing to be considering so first thank you for treading the path of righteousness so to speak. I’m going to go through some of the really simple steps to get you started and I’ll try to de-technify it (probably not a word), erm.. strip all the scary technical terms and make it as painless as possible.
This is going to take an hour of your time so buckle up.
2nd (Introductory Video to WikiProject Medicine)
5th (Step Links, Resources and References)
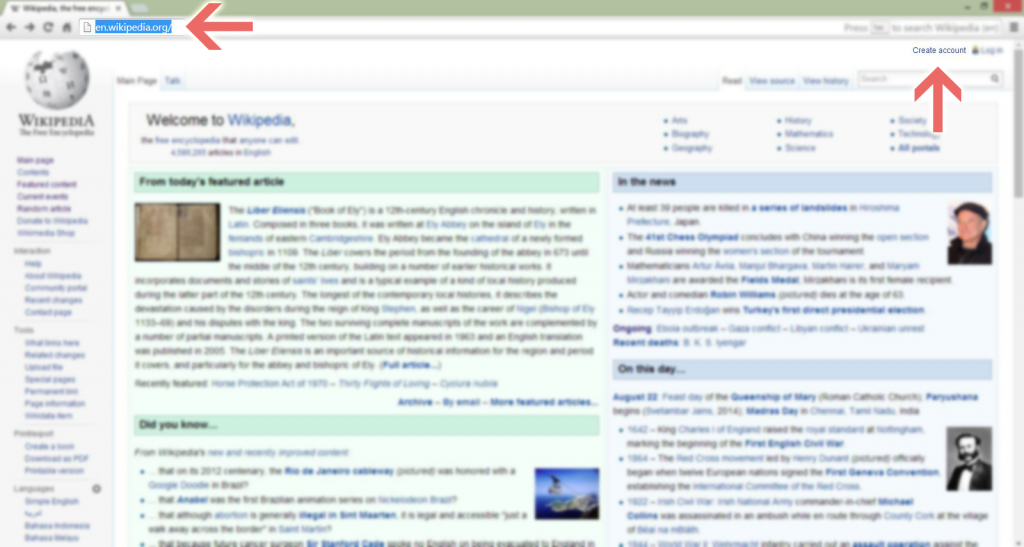
1st Step: Sign up
So first things first lets get you started with an account, pretty straightforward stuff, your regular run of the mill username/password etc. it’s totally up to you how you want to introduce yourself and your right to anonymity is something Wikipedia will fight to maintain (and they’ve been quite good at that – read more about that here). It might be a good idea though to let people know about your credentials/qualifications but we’ll talk about that later.
You will get a page that looks like this: (don’t worry about it for now we’ll come back to it in a bit)
2nd Step: Watch this video
I really like the way this video is put together, very encouraging and informative at the same time. So to recap on what was mentioned in the video after you’ve got the user account we’ve just created, you will be redirected to your user page; each page on Wikipedia – your user page included – has this little tab on the top that is called a talk page – it looks like this:
The way this works is that it’s kind of like when you were at school and you wanted to have a conversation with the person sitting next to you during a lesson, you’d get a piece of paper and write little notes on it, to have this conversation.
So the talk page is like that little piece of paper in that it’s a way for people to communicate about each article/page on Wikipedia; anyone can edit a talk page and leave their comments, usually signing them off with their user name.
– Aaah so that’s what a talk page is!
– Yep, pretty simple huh?
– Yeah..
(back to the top)
3rd Step: Code-breaking
So we now have a user, know what a talk page is and understand that anyone can edit almost any page on Wikipedia, our user pages/talk pages included. Now let me introduce you to a couple of icons we’ll be seeing a lot of.
~ (Tilde) This squiggly line type symbol is actually referred to as a ’tilde’ – a bit like a tile with a “d” on the end – we’ll be using this fellow to sign our comments.
| (Pipe) Otherwise known as a vertical line – not really an exciting name – it will be used within links to separate them
{ } (Braces) [ ] (Square Brackets) < > (Chevrons) These ones are easy and I’m sure you’ve seen them before but we’ll be seeing a lot more of them…
– So where might I see these characters?
Signing off
This is pretty simple; just add four ~~~~ and you will automatically have signed off with your user name – make sure you’re logged in though!
Links
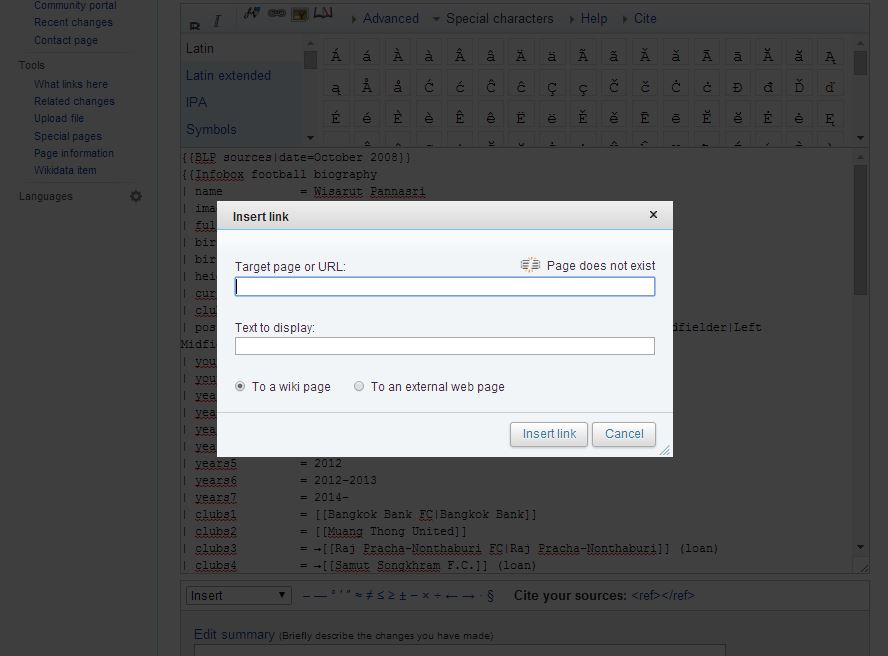
We won’t get into anything of too much detail about links here, but basically there are two types of links; internal links – within Wikipedia, and external links – not within Wikipedia, to add a link click on the button below and fill in the two boxes:
This will look a bit like this:
At the end it will look like this (Internal link; within Wikipedia), notice the brackets and pipes.

(External link):
When you want to add links in more detail, look here.
References
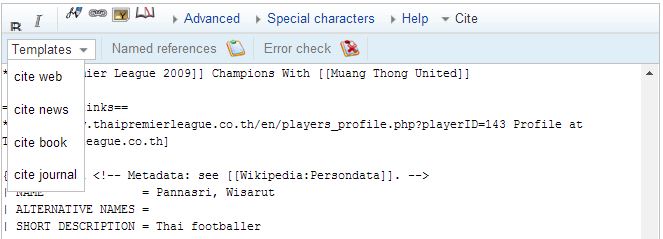
There are a lot of things we can do with references but to start you off you’ll want to press this button: (you’ll have to have javascript enabled):
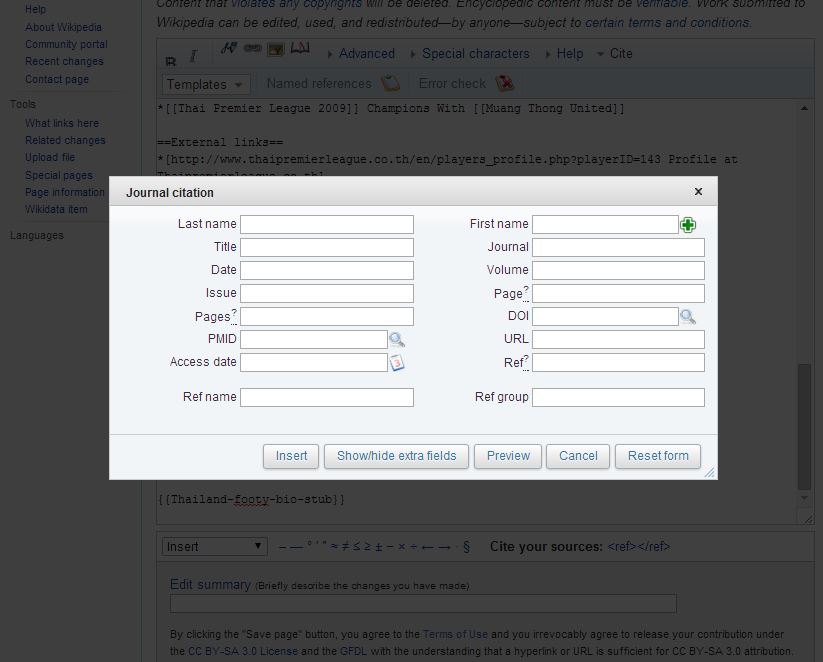
You will get a drop down menu that says templates, we’ll want to go to ‘cite journal’:
Then the text can be added here:
Eventually, it will look a bit like this, don’t get too scared just try to get used to what it looks like, see all the pipes and different brackets?
4th Step: Lets give it a go
This is the link to the page we got a couple of steps a go: what I want you to do now is follow the steps and give editing a go.
If you don’t like the subject that was chosen for you, you can pick another article.
Just have a quick walk through and get an idea of what things can be edited.
– Pheww.. that was hard work!
– Well done!
So we have had a taster for what things are like in Wikipedia, ran into a couple of problems? Don’t fret. There are still plenty of chances to get things right. What we have set up for you folks is an educational environment where you can learn and try out editing with supervisors available to help.
This is all part of our Wikipedia Week event page, which I am sure you’re all so interested in taking part in – wink. This is in no way me trying to get you to register for the event – wink wink nudge. Follow the links on the page to register for the event and start working your way through the education material, so that you may be ready for it.
OK, so you can give yourselves a pat on the back for getting this far, the next thing to do for now would be to visit the WikiProject Medicine page and have a go at adding your name, it is not as easy as the last task but it does not involve any technical knowledge just simple copy and paste and edit; I’m not going to get into how to do this because I want to hear back from you on how it works out; use the talk section of the page or tweet @Student4BE using #Students4WPM at the bottom of this page. Also have a look at the resources in the next step.
5th and Final Step (for today): Where to go if you’ve lost your way.
So as you’ll have heard from the video there are a couple of places you can go to to post your questions and get some answers from experienced Wikipedians and those places are:
- Teahouse
- The Doctor’s Mess
- Asking questions
- Links in the cheat sheet, below
Okay so thanks for bearing with me till here, I realize these things can’t be explained enough so please please please do not be afraid to ask any questions you have and post your feedback. As soon as you’ve managed to do these couple of tasks you should be ready to start exploring for yourself – use the links in step 5 for guidance.
MEANWHILE If you do decide to try editing anything for yourself bear in mind it is very important not to break any copyrights; that means DO NOT use your ctrl-c/ctrl-v buttons ever again; copying and pasting is a breach of copyright even if you do reference; anything you want to add to Wikipedia has to be in your own words unless it is shared via something called a Creative Commons Share Alike license.
Take care and happy wikipediaing!
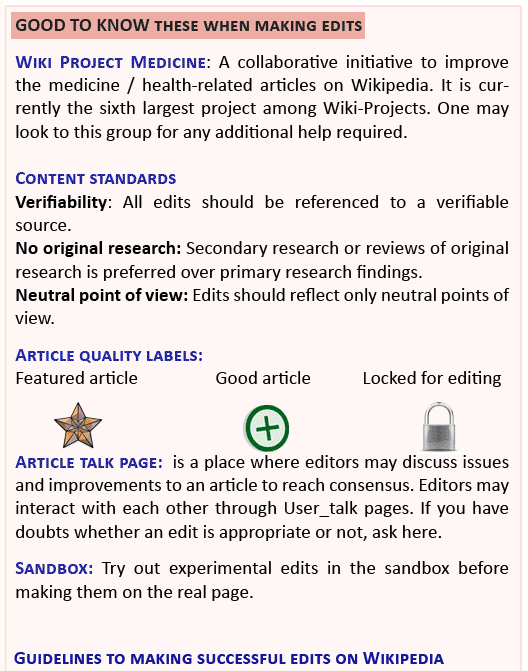
CHEAT SHEET: I have always loved a good cheat sheet! This one is courtesy of S4BE Contributor, Manu Mathew et al, and a big thank you to our WiR Sydney for finding it!
![]()





 0
0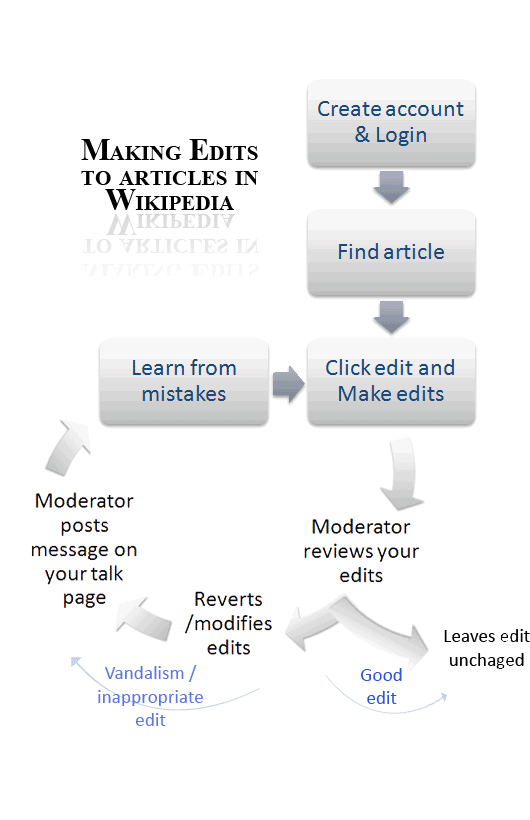


No Comments on Wikipedia Medicine Newbie Crash Course